Sunday, October 31, 2021

KoW vs Gordon's dwarves

 Final playtest.

Last chance to try out ideas before lists are due to be submitted for Conquest and so I came up with a last minute change to add some chaff units.

 My Ogres (2000 points)

·                2x boomer regs

·                2x beserker regs

·                1x shooter horde

·                2x hunter hordes

·                2x siege breaker hordes- 1 with healing brew

·                1x boomer sergeant- inspiring talisman

·                1x warlock

·                1x Nomogarok  

I made a few changes from the last game. I decide that 4 characters was to many , that I lacked flexibility and could do with another regiment to get to 12 units on table if I could.  

I spent last night rebasing my boomer horde as 2 regiments- the theory being that as I want to use them to screen my siege breaker and hunter hordes anyway there is more flexibility as regiments, sure they work out dearer pointwise but also give more unit strength and adds a chaff option and flexibility fr target selecetion. 

Likewise I was going to take a warrior horde as my final choice but at the last minute swapped it out for 2x berserker brave regiments, again to act as chaff and flexibility. This meant downgrading the beserker bully/ sergeant as well- replacing it with a warlock.

A rejigging that gave me 12 units and a few chaff options.

Gordon played his Brocks of Doom list which he has locked in for Conquest.

 Gordon’s Dwarves

  • 2 regiments Ironclad both with throwing dogs,
  • 1 troop of mastiffs,
  • 2  troops of brock riders
  • 2 regiments of brock riders 1 with brew strength, 1 with brew sharpness,
  • 2 troop sharp shooters,
  • 1 regiment of rangers,
  • 1 berserker lord on a brock.
  • 1 lord on a beast with blade of the beast slayer,
  • 2 ASB 1 with heal 3, 1 with bane chant 2.
  • 1 hero or lord on a brock.

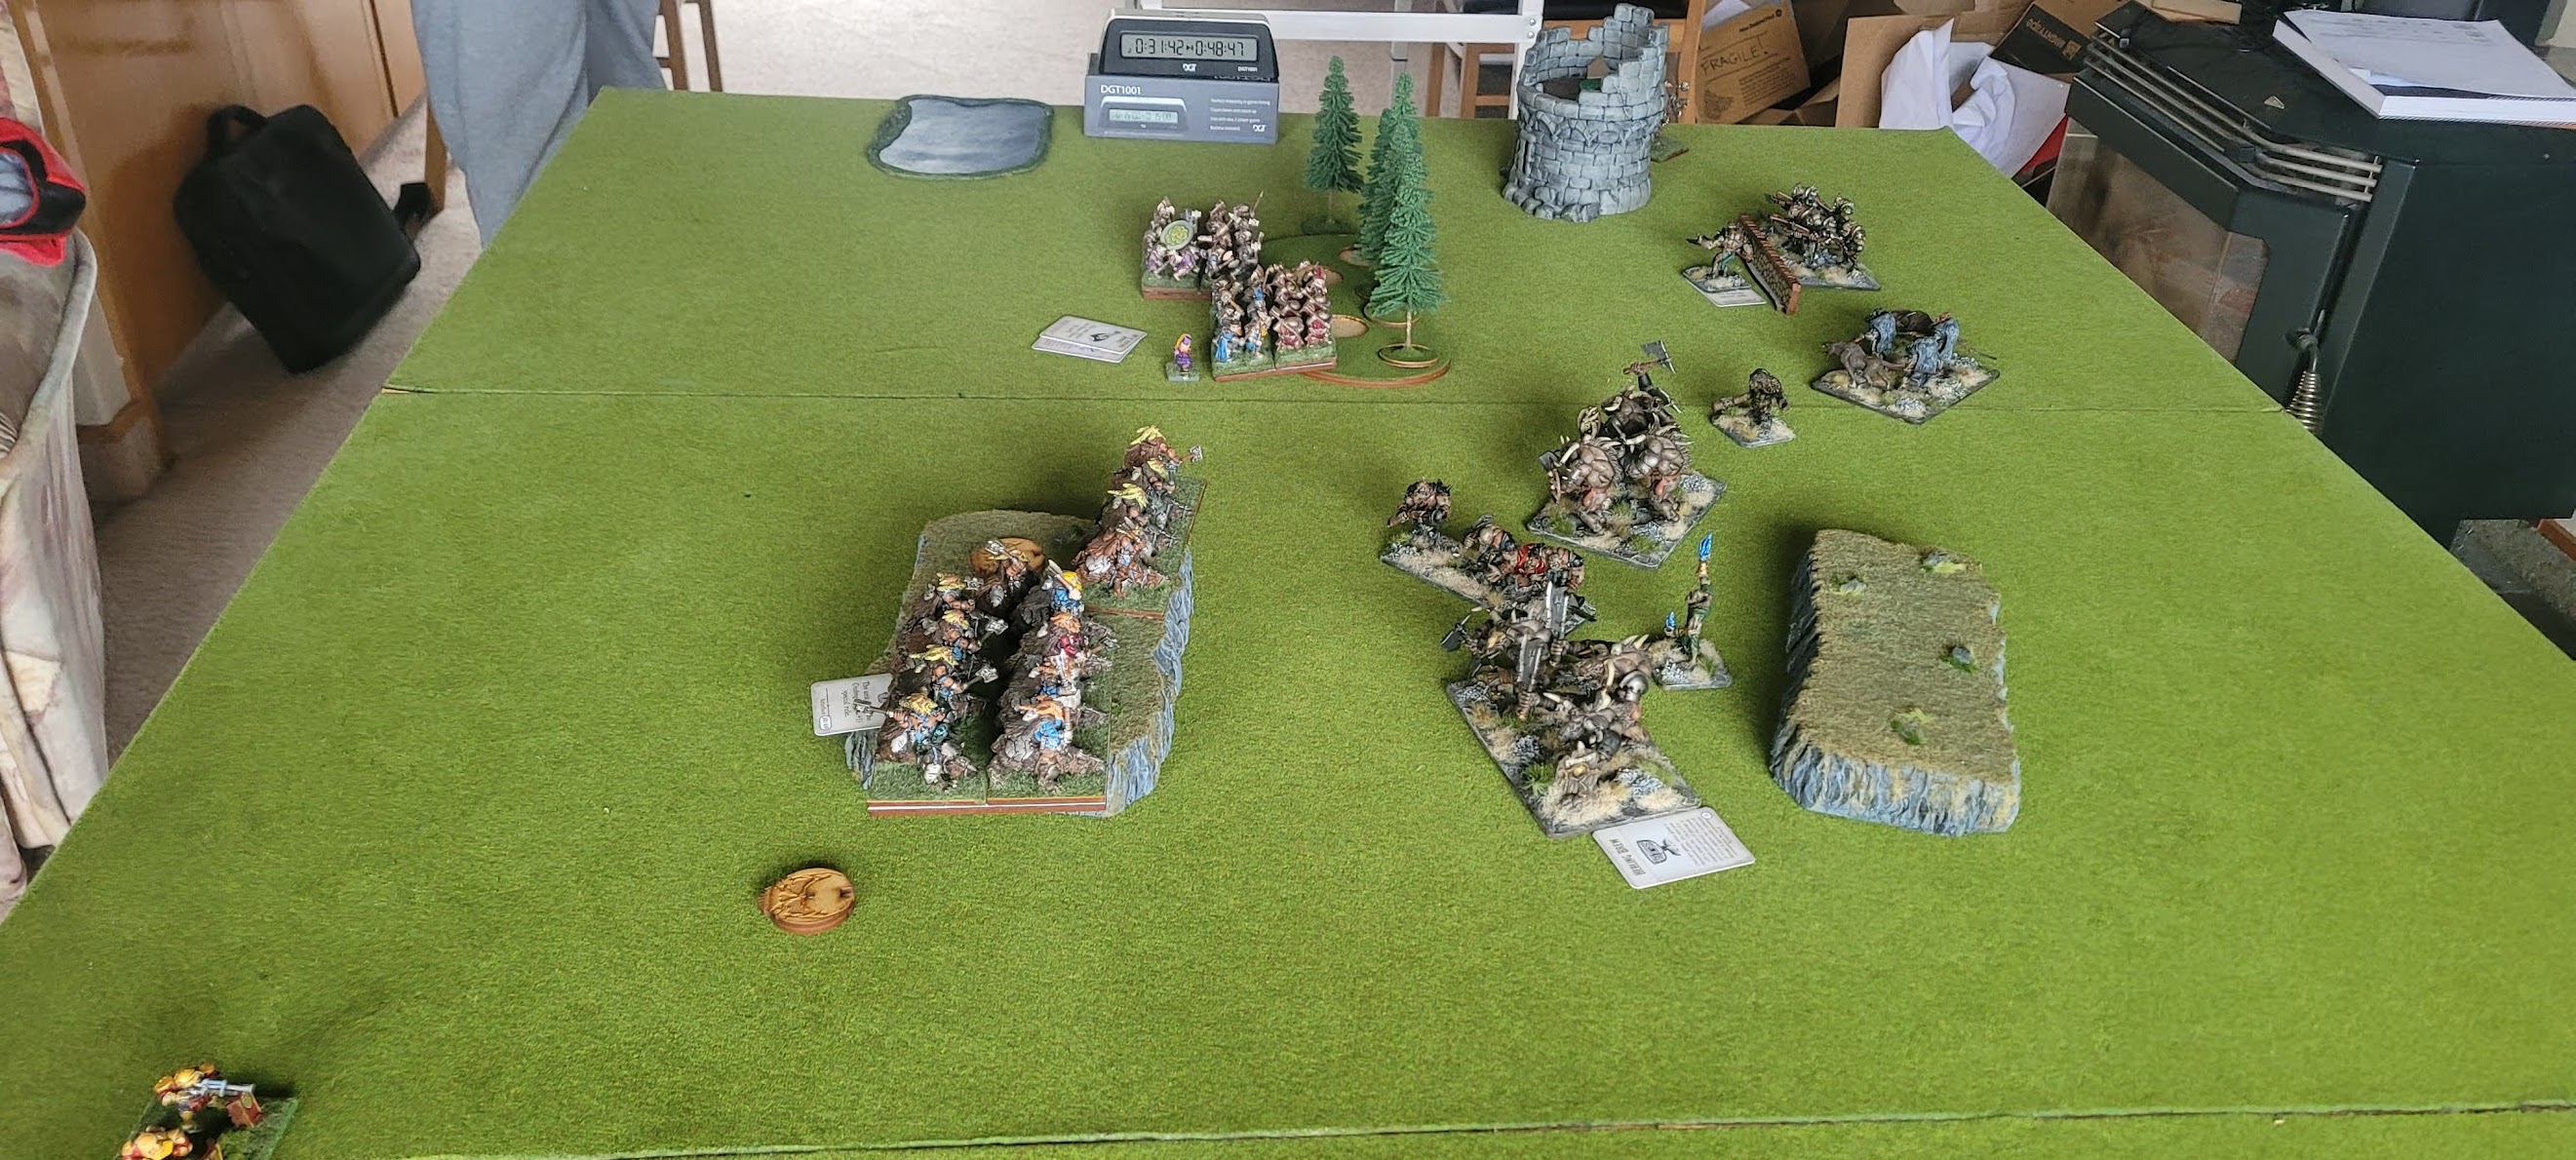
 Mission: Loot. Three objectives spread across the centre line whoever controlled more counters at the end f the game would win.

 My cunning plan

I’d decided to ignore the objective in the woods on the right and aim to take the centre and left hand ones. This was mainly as i didn't think the hunters could cope with the 2 Ironclad regiments and brock lord. 


This photo gives a good view of the objectives. As  I said I'd decided to go for the central and ledt hand one. I really didn't feel confident thst the hunters would be able to defeat the two Ironclad regiments which were supported by the brock lord. 
 

Gordon won the roll off and took the first turn. He concentrated his shooting on the boomer regiment in front of the siege breakers, doing 7 wounds but Nom Nom rolled really well and healed six of them. As you can see the ogres in the centre also claimed a hill. 

Gordon was trying a new tactic, rather than shielding his brocks from the Ogre shooting- which there is a surprisingly large amount of, he wanted to stay in the open. I obliged him and concentrated all my shooting (2x brock regs, shooters, and warlock) on a brock troop blasting it off the table. 

Bottom of turn 1- the goblin scouts with their 20" charge range threaten the brock riders flank. On the far right the borck lord is making a solo run down the flank while both Ironclad close in on the objective. I forgot the lot tokens are moveable so my cunning plan to contest later in the game came unstuck next turn when the dwarves grabbed the loot token then ran off with it!

Turn 2- I threw a berserker regiment at the troop of brocks. Gordon pointed out afterwards that I shuld have also advanced the siege breakers to within 12" of the beserkers to counter charge the next turn- I on the otherhand was thinking that I would charge off the hill when Gordon went for the objective. Funny how each player sees things differently. 

I again I concentrated my fire and this time blasted a brock regiment to smithereens- which I must admit gave me cause to think I had a chance in this one. Two brock units down so far. 

Turn 3. Gordon's reposne? A triple charge. Ouch! The outcome of this one was pretty much a foregone conclusion.  

Yep. In the top of the photo the brock lord can just be seen peeking out beyond the tower. 

Turn 4. The goblin scouts got sniped by the sharp shooters. The boomer regiment in front of the sharp shooters had also finally been removed- lasting a couple of turns longer than they should have thanks to Nom Nom. The beserker braves have entered the wods and so threaten the rangers so Gordon threw the mastiffs at them- the bserkers saw them off on the counter charge.  


This is the turn where the wheels start to fall off. The siege breakers on the right should have continued to suppor tthe centre rather than wader off after the Ironclad. the ther siege breakers grab the centr eobjective. I was confident that my shooting at the brock troop by boomer reg, bomer sergeant, warlock, shooters and Nom nom would blrw the already damaged troop off hte hill but I failed to finish off the brocks (low nerve roll) and so suddenly my siege breakers are facing a double charge in the fornt and flank by brocks! 


Yep, in DBA this would be called closing the door. My own fault, I shouldn't have been so cocky and had the bomers been better positioned it would not have allowed the flank charge to happen. Clever use of the brock lord also allowed Gordon to charge just part of the siege breakers front. 

Gordon also throws the Ironclad to hold up the siege breakers and cover the other Ironclad regiment which is running off with a loot token. I was tempted to head the hunters to reinfrce my centre and left but in the end turned them to cover the shooters from the brock lord instead. 

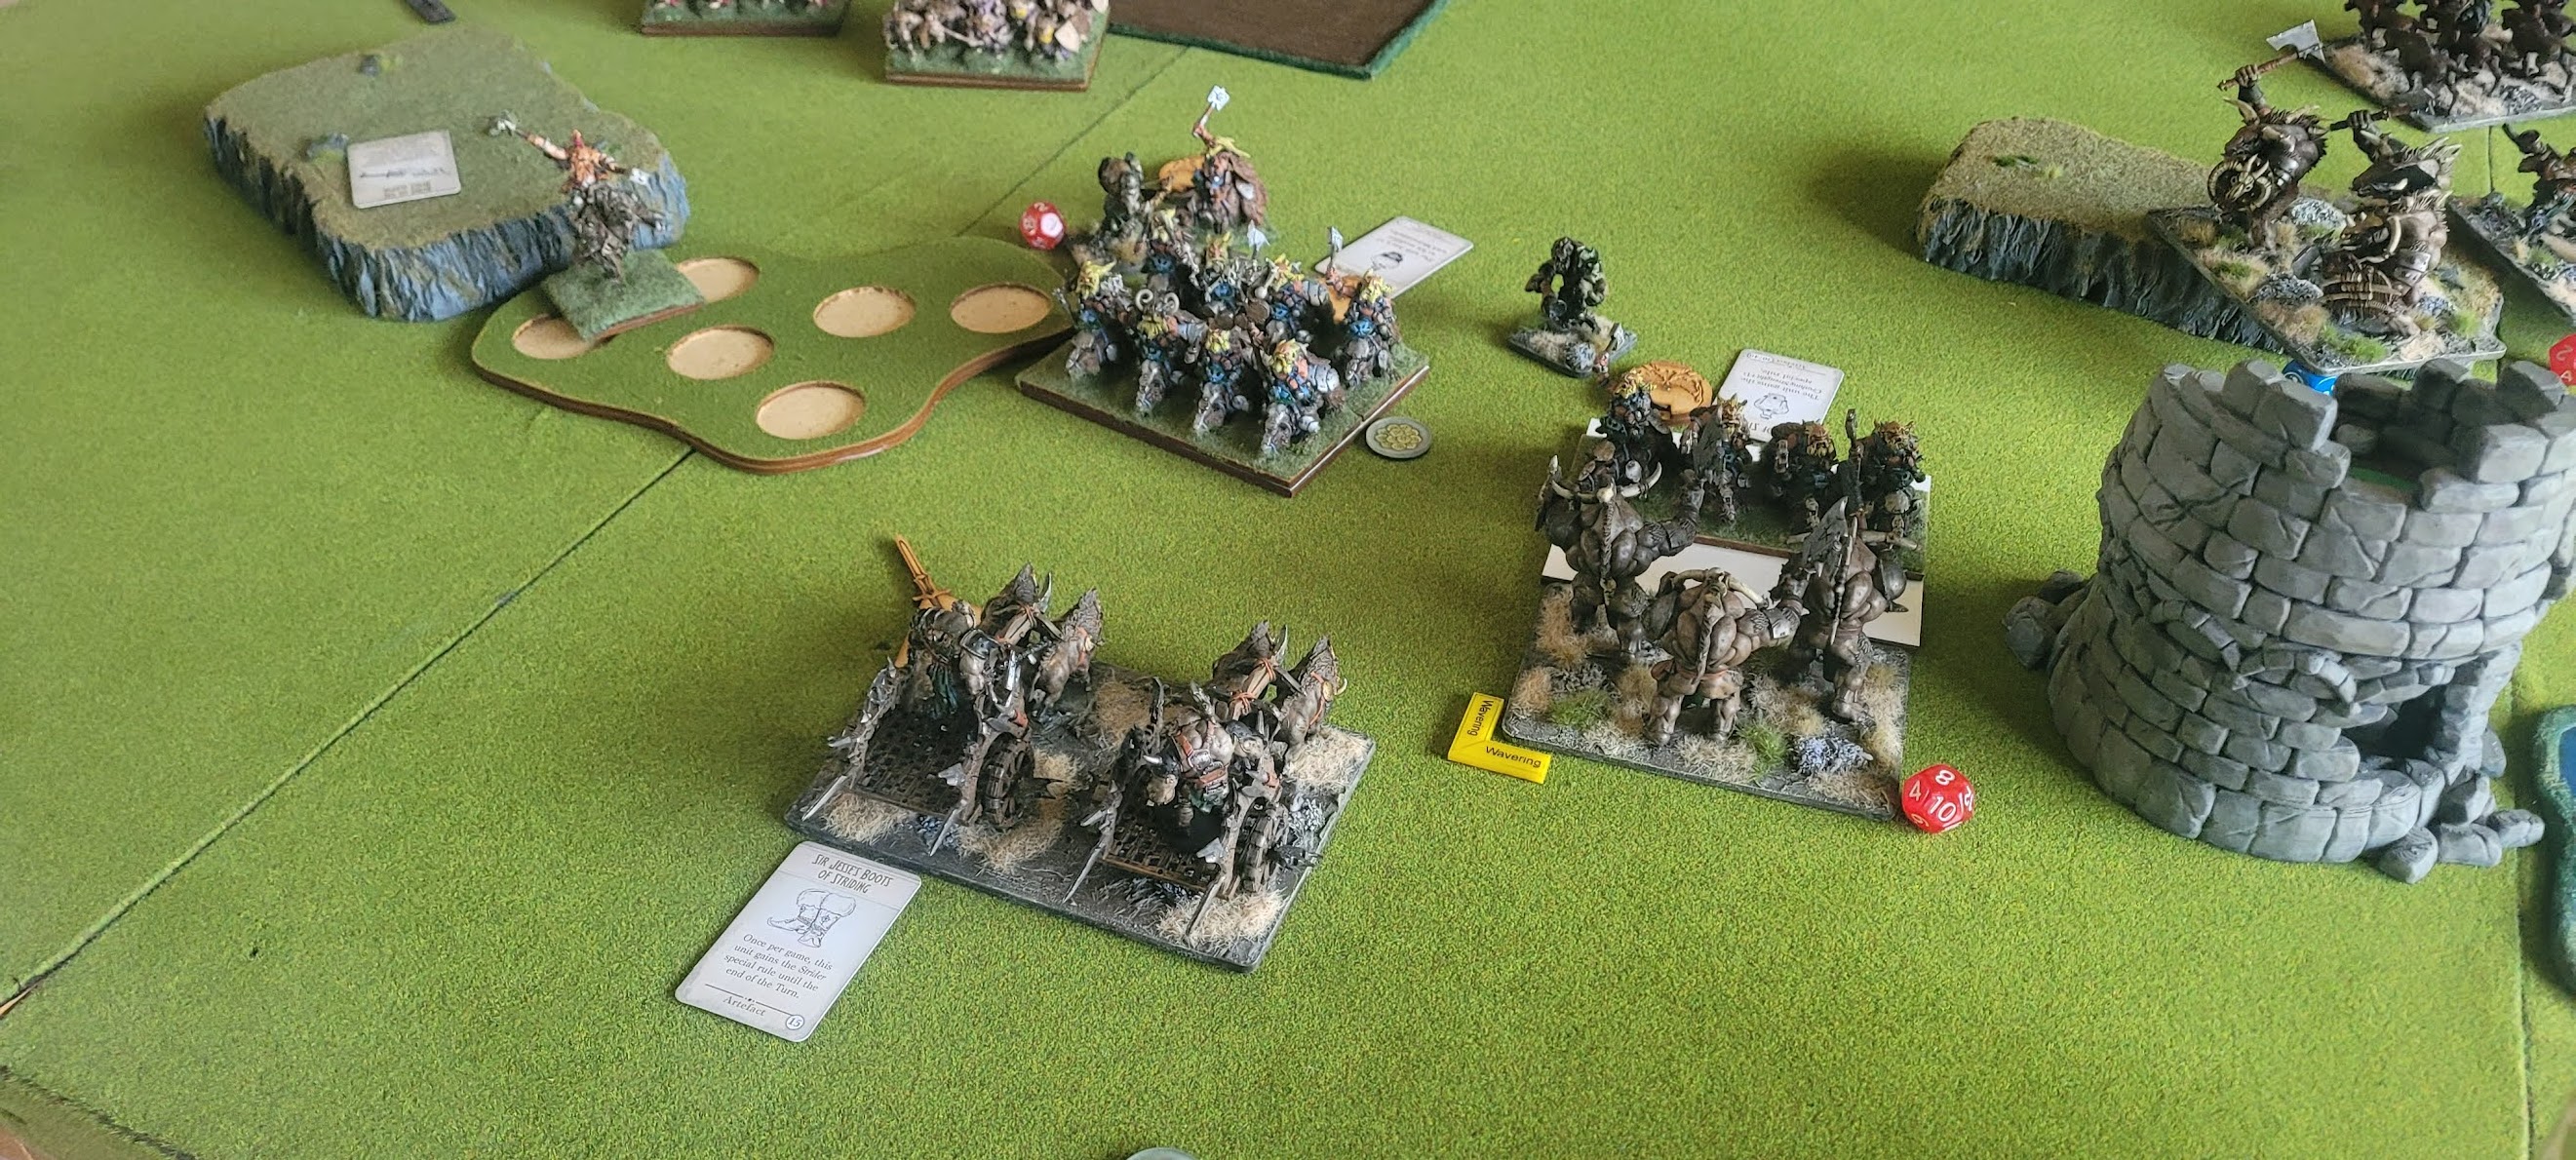
A Brock, A brock, my kingdom for a brock!

Close up of the fighting vs the siege breakers. 

The scrum in the centre.

The siege breakers are destroyed, the brocks capturing their loot token. On my turn the bomers and Nom Nom shot the brock troop, devastating them...  until I rolled double 1s!!!! F#@K!!! Those damn brocks are invincible.

The brock troop slams into the boomer regiment destroying them while Nom Nom stares down the brock regiment.

The rangers and sharper shooters still contrl the left flank and not much I can do aobut either. 

Turn 5 or 6. The brocks head off towards the left objective, and Gordon advances his sharp shooters. The lord on the brock charges Nom Nom. 

In response, Nom Nom uses his nimbleness to withdraw, dance round the brock lord and flank charge the badly wounded brock regiment killing them and claiming a token. The beserker braves though danaged a poised to grab the objective on the other side of the hill.  

Turn 6 On the right the hunters, siege breakers and shooters chase the retreating Ironclads. Nom Nom was waivered by the  rangers. If the game ends now then it is a 1-1 draw. 


Alas Gordon rolled a 4 and there was a turn 7. The rangers grabbed the objective in front of the wall- the brck lord having killed the beserker braves the previous turn. Gdon blocked thehunters and siege breakers from charginf down and grabbing a loot token from the Ironclad by sacrificng an army standard, whle Nom nom was killed by the sharpshooters. 
 
Result: 1-0 to Gordon.

Thoughts
Wow, what a game! That one really went down to the wire. Again their was plenty to be learned but felt that my tactics were solid, a couple of dice rolls went agaist me but that is wargaming. Gordon was really on the back foot turn 2 with two Brock units down but as he pointed out afterwards me nt advancing the siegebreakers into charge range gave him the ipening he needed to counter attack and get back into the game. Still it really was a good game and felt that we both had opportunites to take it but  in the end though Gordon was able to sacrifice a the standard bearer to ensure he kept an bjective. 

Two losses over the weekend but both good games and I feel happy with the way the list has evolved and liked the balance of this version. The 4x regiments added plenty of flexibility on attack, could act as chaff,  added to the unit strength of the army and although they didn't do anything this time the scouts added another dimension for Gordon to take into account so like the overall balance I have now. 

KW: Goblins vs Ogres


Another very enjoyable game KoW yesterday vs Josh’s goblins. Conquest in Christchurch is only a few weeks away (if it is able to go ahead due to Covid- CHCh has some cases after a yea and although vaccination rates are getting up there still not at the 90% gov’t requires) and army lists are due so this weekend was our last chance to try out ideas. Josh has been busy working on getting his army ready and each game has more units completed; he has a few substitutes at present but the army is coming along nicely. Below is a shot of his nely done trolls. 

Recently he has swapped from goblin rabble hordes to goblin rabble regiments t act as chaff and this is working well for him.

I too had made  a few tweaks to my list, wanting to try out two hunter hordes and added a regiment of warriors.

 Mission: Loot

Josh’s goblins (2000 points)

·                4x Goblin regiments

·                3x troll hordes

·                1x mincer mob

·                1x mincer

·                1x winggit

·                1x goblin king

·                1x goblin wizard

·                1x mawbeast pack

·                1x Magwa and Jos

·                1x troll buiser

·                Something else?


My Ogres (2000 points)

  • 1x boomer horde
  •  1x shooter horde
  •  2x hunter horde- mead of madness
  •   2x siege breaker hordes
  • 1x warrior reg.
  • 1x beserker bully
  • 2x boomer sergeant
  • 1x Nomogarok  

This game we used a clock which did change the way we played and I rushed, perhaps too much at times- for instance on turn one I completely forgot to shoot my boomers!

 Deployment 


Turn 1 ogres go first- and forget to shoot the bomes but did damage the magwa'ns. 

 
The goblins advance in the centrre. 

Turn 2- the goblin regiments almost take out the boomer horde! While a mincer bounes off a siege breaker horde. 

Turn 3 and the two armies clash. 

I use Nom Nom to heal the boomers and they hang in there. 


Turn 4. On the left flank the hunters and trolls are duking it out but I continue to lose untis. 

Turn 5: I am fast running out of units. nom Nom spends most of the battle healing untis. 


Turn 6- I've not much left to contest. 

The shooters at least hold one objective and the goblins bounce off them. 

The pivtal final move- the troll bruiser charges the flank of the siege breakers adding his +1 unit strength to sway the objective to the goblins.

Thoughts

Josh played his army well, he can afford to lose units and ensured that he held up the units he needed tow- the tw regiments of goblin rabble on turn 1 almost took out the boomers and Josh was able to keep my force under pressure, a couple of key battles in the end fell his way and although the score was 4-1 to him the game was actually a lot closer than that- till the start of turn 6 anyway.

I have a small army and really struggled vs the grindy goblins. I got stuck fighting chaff and although the game swung a couple of times in the end the goblins were able to hold up the ogres and allow the trolls and troll bruiser to wrestle the game back to the goblins. Turn 4 I decided not to lightning bolt the damaged winggit and this allowed it to claim a 2 point objective without me able to interfere so that was well played by Josh.

I think we both focused well on objectives  but in the end I lost too many units and the troll bruiser was able to swing the second 2 point objective to the goblins on turn 6 (4 vs 3 unit strength for the win) to change a 2-1 victory to a decisive  4-1.

I think I may have one character too many and need another regiment or two in the list so have  a cunning plan for next game (and final chance to test ideas) vs Gordon…

 Craig 

Monday, October 25, 2021

KoW Ogres vs Dwarves

 Gordon’s Dwarves

Gordon used his tandard dwarf list again. 

  • 2 regiments ironguard both with throwing dogs,
  • 1 troop of mastiffs,
  • 2  troops of brock riders
  • 2 regiments of brock riders 1 with brew strength, 1 with brew sharpness,
  • 2 troop sharp shooters,
  • 1 regiment of rangers,
  • 1 berserker lord on a brock.
  • 1 lord on a beast with blade of the beast slayer,
  • 2 ASB 1 with heal 3, 1 with bane chant 2.
  • 1 hero or lord on a brock.

 My Ogres (2000 points)

A slight change to my list, replacing the giant with a regiment of chariots. Not 100% sure of the chariots but we will see how they perform. Will they succumb to the new unit curse or will they earn their keep?

  • 1x goblin scout regiment
  • 1x boomer horde
  • 1x shooter horde
  • 1x hunter horde- mead of madness
  • 2x siege breaker hordes
  • 1x chariot regiment- Jesse’s boots
  • 1x sergeant with crossbow
  • 2x boomer sergeants
  • 1x Nomogarok  

 Mission: Plunder

 My aim was to try to slow the brocks down if possible and concentrate my firing to remove the brock troops as quickly as I could. I need to deal with the regiments but Gordon always protects them well as so the troops need to go first. I hoped to be able to avoid the ironclad regiments till later in the game.

Deployment. I won the roll off and chose the bottom of the table and also got the first turn. 

 Deployment


Trun 1. I advanced a bit, the shooters put 3 wounds on the sharpshoters but failed to kill them- the wounds were then healed by the standard bearer- which is a ttad annoying but a very nice combo.  


Gordon advances his Ironclad and brockriders. 


Turn 2:  The brocks advance. 

My boomers, Nom Nom and the boomer sergeant concentrate on the rangers in the wood who take a few wounds and retreat deeper into the woods. In the centre the other boomer sergeant advances to shoot at the brock troop- the shooters and sergeant concentrate on the same target. 

Bring it on! The boomer sergeant issues a challenge. Gordon in his previous turn had concentratred fire in the hunters causing quite a few wounds as they were in the hill and in the open  so I pulled the hunters back into the trees. 

A view from the dwarf side. 


Gordon turns one troop of brocks to face the boomers and siege breakers

Turn 3, the boomers advance onto the hill. The scouts turn to face the centre of the table. 


Charge! Gordon throws his brocks into the shooters and siege breakers. In the top of the picture, jsut above the magic item card is the brocklord who blocked the charge of one of the brock regiments ensuring that the brocks charge did not carry them into the woods and so was an unhindered charge-  a very cunning move!

This shot gives a better view of the brcks "clipping" the shooters, the shooters are destroyed in the melee. 

On the hill the brock troop charges the boomers

End of the turn the shooters are dead and the brocks advance to the chariots preventing them from charging due to the angles they are on- the chariot hasn't enough room to wheel into the flank of the brocks and can't attack the front of the unit as technically it is positioned on the flank. 

Gordon took out the boomer sergeant out with the mastiffs- I should have simply shot the mastiffs rather than charging, this allowed the rangers to also charge the flank of the boomer sergeant- bye bye sergeant.  

Turn 4: The boomers and siege breakers charged the brock troop on the hill- unfortuantley the siege breakers blocked the goblin scouts from making a flank charge into the brck rider regiment attacking my other siege breaker horde. 

The chariot had no choice but to back up... and wait for the charge of the brock lord- who had just finished off the hunters, and the regiment of brocks on the left. Ouch!

This will not end well for the chariot- which succumbed to the newly painted model curse of being destroyed before rolling a dice in anger.

Turn 5: The dwarves have crushed the ogres left flank and centre- things are looking grim for the ogres.


Ogres turn 6- I can't get back across to contest the objective and shoot the mastiffs so I am banking on a turn 7. The boomers do however do enough wounds to kill the mastiffs. The mastiffs take a load of wounds but I rolled a double 1 for nerve check and they shrug off the wounds. 

The brocks line up the siege breakers on the hill...

and charge.

In the very top of the screen the scouts have been fighting the sharpshooters for the past two turns and contest the objective. 

The mastiffs block the boomers from contesting the far objective if there is a turn 7.

Alas, no turn 7.

Result: 3-2 to the dwarves. 

The main moves


1. Hunters killed by lord on a  beast.
2. Shooters charged and killed by brock riders.
3. Siegebreakers killed by brock riders.
4. Brock troop killed by sigebreakers+ boomers
5. Boomer sergeant killed by mastiffs and rangers
6.  Rqngers killed by shooting from boomers
7. Sharpshooters killed by goblins. 

Thoughts

As usual Gordon played a very tough game and really gave me a lesson on using angles of various units to both block charges and ensure flanks. 

I made a couple of mistakes with cost including deployment. I usually have the siegebreakers together but this time had one on each side of the tower, this meant the one of the right really wasn’t able to get into the game and was unable to effectively support the other unit.

Charging the mastiffs with the boomer sergeant when I should have simply shot them instead was also a mistake. It enabled the rangers to charge the boomer sergeant and pushed me back off the objective which I was unable to reclaim. Gordon set the trap and I tok the bait. 

Brocks vs shooters. I thought I had it so that my shooters would need to be charged with a hindered charge but as it turned out Gordon used his dwarf lord on a brock to screen the lanes of charge so that the borcks charge counted as being in the open. Gordon had been discussing this move before but was interesting to see it on table. Lesson learned- ensure the unit it totally in the woods! This charge was the key to busting my defence wide open and the brocks literally smashed my centre from there. 

Advance after combat- Gordon used his brocks to advance after killing the shooters as that they all but touching the chariots. In my turn the chariots were unable to charge the flank of the brocks  which was a tad annoying but well within the rules, instead my only option was to back up and die the following turn thanks to a well executed multicharge.

 What went well?

Focusing fire of my various shooting units vs the rangers and brocks.

 Improvements

Lots- not happy with footprint of the chariot or how I used it and not sure I will continue with it i think i prefer the smaller footrint of a giant or mammoth. 

I needed to use the boomer sergeants and other units as a screen to slow the brocks down and failed to do so. 

Red Goblin scouts- they ended up getting me one of my two objectives but I am still not completely happy with them and before the game was tempted to use a regiment of beserker braves instead and think that they way be worth a crack in my next game as they will be a good chaff/blocking unit and still have a pretty god threat range due t wild charge.  

Facings, again Gordon showed great use of positioning of units and this is one element of the game I really do need to work on, I am far to lax and not really looking at all options, same goes with use of characters to block charges. 

 As usual Gordon played well and once he found his opening really did all he could to pile on the pressure. I was pretty confident of holding the brocks going into turn 3 but the charge that avoided the woods was very well executed and really busted the game open for Gordon. 

Thanks Gordon for another very enjoyable game.