Labels

28mm Armies of the Crusades (48) 28mm Imperial Rome (8) Bolt Action (150) FoW (171) Impetvs (124) Terrain (89)
Showing posts with label Terrain. Show all posts

Sunday, May 12, 2024

Log Bunkers

 This weekend I made some log bunkers for my games in the Far East. 


MDF base and kebab skewers form the basis of the bunker. 

I used some foamcore off cuts to build up the basic shape of the bunker. 

This was then covered with plaster and sand added for texture. 

A couple of coats of brown paint then flock, woodlands scenic clump foliage and random pieces of aquarium pants added to finish off the bunkers. 

Not bad. 

A fun little project. 

Thanks to the terrain tutor for giving me the idea. 


Craig


Sunday, April 28, 2024

Dug in markers/ trenches for games in the Far East

 After my last game I deciced I "needed" some dug in markers and/or trenches for games oin the Far East and Burma so ahve made a few over the past day using MDF, permafilla and a few sticks. I am pretty happy with how they have turned out.


Last night I also put together a couple of 3D printed Japanese 75mm mountain guns to add a bit more artilery support to my Japanese forces. Simple to put together and they paint up nicely. 


Craig


Monday, March 11, 2024

Terrain for gaming in Burma

 In the last couple of weeks I've been explerimenting with making rice paddies for games set in Burma and he Far East. Quite happy wih how hey have urned out so far, bu ened o make a few more when i get time. 

I also took the opporuniy to tidy up my jungle terrain that had got a bit chipped in the past few years. Someone needs to wrie  abook, 101 uses for plastic aquarium plants :) 


Until next time

Craig 

Sunday, February 11, 2024

This week's update

A productive week in the wargaming hobby. 

Frist up a Warlord Games/ Italeri Panther A with Zimmerit. Can't remmber when I got it but it's been lying round made up but unpainted for far too long. Was very happy with how it turned out. 


Project #2- new barded wire entanglements for Bolt Action games.  Pretty simple- the key as far as I am concerned- is to use tile spacers from the local DIY store for the supports. 


This morning I painted up another squad of US infantry in Greatcoats- again these are the lovely Artizan Designs range. I can't recommend them enough. They have great details that paints up easily and look great. 

I repainted a couple of buildings to match the new Warlord Games ones I've painted up. 

Finally, last week I build three of the Warord games Ruined farms/hamlets whch I enjoyed painting up. 


Craig

Sunday, January 14, 2024

Some more reinforcements

 Today I built a second MMG pillbox and also a larger blockhouse which can house 8 men for my Italian Campaign for Bolt Action. I am prettty happy with how they turned out. 


I also made a nother Rubicon Sherman V for my Free French so now I can field a troop of three shermans. 


Craig

Saturday, January 13, 2024

Fortifications for Bolt Action


I decied I needed some dug in markers/ trenches for Bolt Action... along with some minefields and other miscellaneous field fortifications/ terrain. I had a fossick yesterday and discovered some barbed wire entanglements I'd made a few yars back and have made some more fortifications to go with them.

They are made out of MDF, balsa and premafilla. Pretty stright forward but turned out pretty good and I look forward to incluing them in my next battle. 


And a pillbox for a medium machine gun team. 


Craig


Thursday, October 26, 2023

Scatter Terrain

 I've been playing a few solo games of Warmaster on my arid themed table over the past few days as I try to get more familiar with the rules. I felt that I needed a bit more scatter terrain- scrub and rough going- to give a bit more variety to the table. I've not made any terrain in quite along time but I'm on holdiay this week so today between other tasks around the house managed to build some suitable terrain to add more interest to the table. 

Over the years I've tried many types of terrain, from dedicated terrain boards to various types of scatter terrain but feel that scatter terrain makes the most versatile table top terrain. 

Rock outcroppings

These are simple to make and look good on table. I make a base out of 5mm MDF using a jigsaw to cut the basic outline. I then file the edges of the MDF base with a wood rasp to make it slightly more rounded. 

I then find some suitable bits of barkchip from the winter wood pile and then glue it on to the MDF base with PVA. 

Once the PA is dry I use some permafilla to texture the base.

Once the permafilla is dry I then paint the barkchip with slightly watered down PVA. PVA shrinks when it dries and this creates a firm skin on the barkchip which prevents it from chipping. 

I then paint the base using a base clour plus plus 1-2 highlight colours.

Finally, I put some dabs of PVA glue and sprinkle on catlitter to represent rock falls .

Once the cat litter is dry I again paint a layer of watered down PVA over it to make it more solid- again the PVA shrinks when it dries creating a solid protective layer. 

And that it is, done. 

Well, almost. I need to add some bits of Woodlands Scenics clump foliage to add a bit more interest/contrast which is a wee job for tomorrow. 


And a few bases for the scatter terrain using the same techniques.  

Craig


Saturday, July 30, 2022

Basing figures

 Gordon asked me how I base my figures. I use a pretty basic system these days and tend to stick to two versions of it-  field green or dry straw static grass depending on the army I'm working on. 

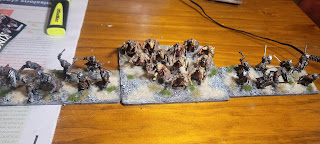
Here is the start of my latest project some "Orcs" fr kings of War using Oathmark Gnolls rather than orcs. I paint the figures then place them on the base to  figure out how I want them to look- in this case I wanted an orcish "battle wedge" formation. 


Once the figures are superglued  to the base I cover the base witha product caled permafilla from the local Mitre 10 DIY store. The orcish wardrums I based today and this is not my usual method in that they are based before painting but with only two figures and a drum I figured what the hell. 

Once the permafilla is dry I use PVA or superglue to add some stones borrowed from the local beach to add a bit more texture. 

A few of the basics- permafilla and test pot paints. 

I then undercoast the base black and dry a "heavy" drybrush of a dark brown shade. 

then the stones are drybrushed a light grey colour. 

Finally I use a yellowy/tan light drybrush to pick out the details of the base this step is done quite lightly. 

Next up is the static grass which covers approx 25-30% of the base. I like not having a uniform cover of static grass as the contrasts draw the eye to the base and the figures don't get "lost" in the base. 

Then I add green tufts for even more variety. 

And finally, some late autumn tufts. 

A contrast between the finished base and the one at the end of the dark brown drybrush stage. 

And the bases ready for gaming. 

Cheers

Craig