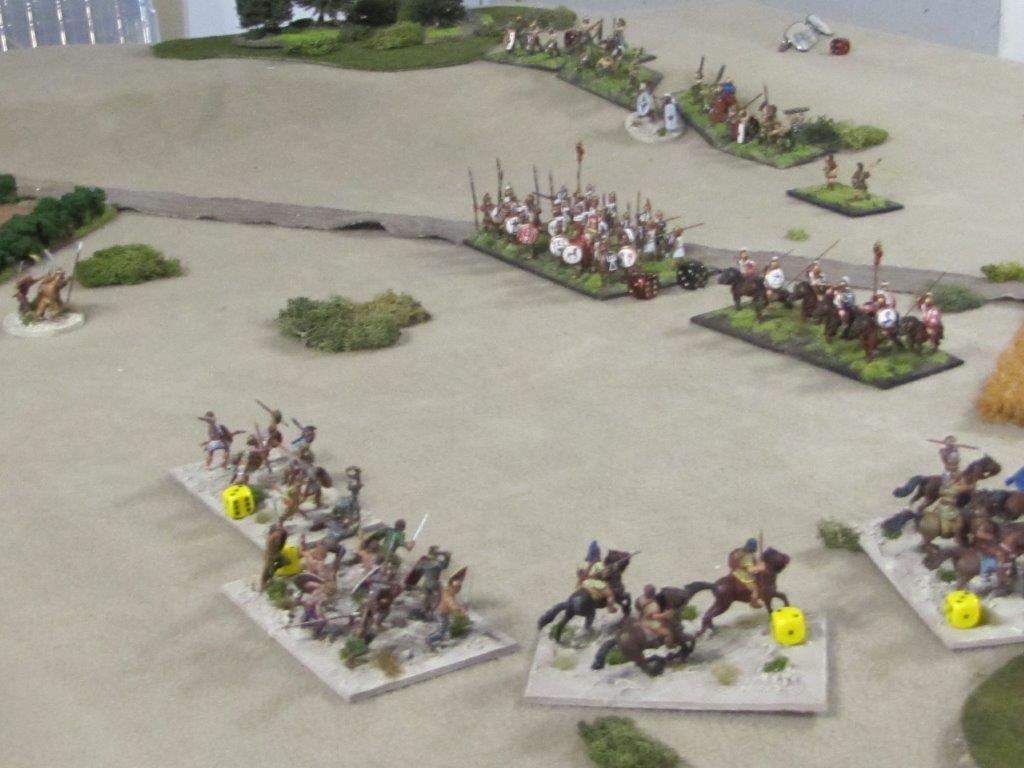
Tonight I popped round to see Kent for one of our not quite frequent enough games. Tonight my Ancint Spanish vs his Carthaginians (1200 points) using Kings of War. As with all the games we've played so far it made for an entertaining and close fought game.
Kent fielded:
2x spear regiments
1x Sacred band regiment
1x Elephant
2x Light Cavalry regiments
1x General
1x Musician
My Ancient Spanish
2x Ancient spanish (with throwing weapons)
2x Celteberian Warriors
2x Caetrati (skirmishers)
2x Spanish Med Cav
1x Gallic Light Cav
We played invade, the objective being to have your troops in your opponent half of the board at the end of the game.
Turn 1 the Ancient Spanish advance their skirmisher screen.
Kent counters with a steady advance.
I held back my celteberian warriors as reserve.
My cavalry advances on the open right flank
Kent sends his light cavalry forward with the elephant in close support.
Turn 3 and all is going well so far though I've lost some skirmishers..
My warriors and the light horse clash.
Gallic light cav vs spears, not ideal.
The elephant crashes into the Celteberians who hold...for now
The battle dissolves into a series of melees.
On my far left flank my ancient spanish take on the Sacred band while the medium cavalry prepares to charge in to support them.
I have a couple of units waver and Kent's general finishes them off.
The elephant turns round to try to kill my cavalry.
The musician routs my skirmishers.
Turn 7 not much is left- battles tend to be bloody in Kings of War.
Result: A hard fought draw.
My plan was simple, avoid the elephant and/or the Sacred Band, I knew I couldn't probably deal with both. As Kent reminded me though afterwards, even a single hit each round would have canceled the elephants thunderous charge so maybe I should have tried to deal with it bit more, my main strategy being to avoid it.
Still it was an enjoyable and fun game. I look forward to the next one, maybe even with a few more points next time...
Having successfully routed the Celteberians in the previous
two battles the Carthaginans marched into the Celteberians stronghold of
Gallaecia to end the campaign once and for all. With their final bastion threatened the Celteberians
were forced into a corner, this was a must win battle to prevent the
Carthaginian’s capturing their homeland and ending the war. After much pondering the Celteberian general
reorganised his commands, making two powerful warbands each with a screen of
light infantry to protect them. His cavalry was tasked with protecting the
flanks and possibly turning the enemy line, all going well that is…
Craig’s Celteberians
Left Division
Centre
Right Division
4x Med Warband
2x Lusitanian Light Infantry
4x Med Warband
2x Lusitanian Light Infantry
2x Med Cav
2x Light Cav
Kent’s Carthaginians
Kent organised his on force as follows (or similar to this)
Left Division
Centre
Right Division
1x Libyan longspear
2x Italian Hill tribes
2x Gallic Warband
2x Skirmishers
1x Libyan longspear
2x Italian Hill tribes
2x Spanish Scutarii
2x Skirmishers
1x Med Cav
2x Light Cav
1x Italian Hill tribes
1x Spanish Scutarii
The Celteberian's assemble for a prematch pep talk.
Turn 1: The Celteberian warbands surge forward screened by their light infantry.
On my right flank the light horse advance to pepper the opposing light horse.
Not to be lulled in by the light horse the Carthaginian line marches forward en-mass.
On the Carthaginian right the Spanish and Italian infantry flank the Celteberian light horse and pepper them with javelins disordering one unit which retreats.
Turn 2 the warband remain stationary while the light infantry moves forward to harass the Carthaginian line.
The Celteberian light horse pulls back out of the Carthaginian noose.
In the Carthaginian turn their line unleashes a hail of missiles which manages to destroy one of the Lusitanian light infantry- grrr...
While on the far left my light infantry are harassing the Gallic warband, inflicting a few hits on them.
Kent sends forward his own skirmishers to deal with my light infantry and protect his main battle line while his elephant lumbers forward.
On the right flank one of my light horse units rolls badly for a break test and is destroyed.
The battle lines close in the centre. Kent charges with his Libyans who win the combat forcing my warband back. The Libyan heavy infatry are close to being shaken in the melee but follow up the retreating Celteberians.
On my turn I throw forward my centre command to try to destroy Kent's centre. The arrow highlights where the second Libyan heavy infantry unit got its wired crossed (a blunder) and retreated back two turns, leaving he flank dangerously exposed. If only I can capitalise on this...
Arrghhh! In my own turn rather than listening to their general the Celteberians stood round discussing the latest goings on in their Gallaecian homeland (poor command roll) and so missed the opportunity to roll up the Carthaginian flank.
The opportunity is lost. Kent rolled well for his command roll and the Libyan spears and Italian infantry double timed it back into position shoring up the exposed flank but I did manage to flank and destroy the Italian infantry. In the centre though it si not going so well, Kent's Libyans win the combat and destroy two of my warband units and other units are thrown back in disorder! My centre is starting to crumble.
On my left I throw my warband are disordered.
In Kent's turn his infantry fell just short of my warband's exposed flank. However, my centre command has all but broken (3 units destroyed) and my battle line is "slightly" exposed.
This is not looking good! I've sent over a unit of medium Spanish cavalry to bolster the line as I try to rally my centre but unfortunately lose another unit this turn and the Celteberian centre collapses.
I really need to destroy Kent's central command! He's lost one unit, another is shaken if I can kill the elephant unit I might still have a glimmer of hope, so I throw my cavalry forward to engage the Nellie's and manage to win the combat and break his centre!
Unfortunately though the Libyan Heavy infantry on the Carthaginian left destroy my warband and break my other large unit. The surviving Celteberians melt away and their leaders sue for peace.
Game and campaign to Kent!
Another great game, I had my chances but again Kent used his troops well and I learned a lot. I really don't like trying to grapple with the Libyan heavy infantry so was trying to pepper their supporting units with javelins to disorder the and remove their supports, which kind of worked. My sending forward my light infantry to harass tactic nearly worked too and if anything showed I need more light infantry! I think 1 per warband would do well! My plan was to send the light infantry a couple of moves forward so they could retreat, fire javelins (or evade) then retreat again before the Carthaginians struck my line, I probably needed two more units of light infantry to do this a bit more successfully but was sound in theory.
Kent commented last game that he was forgetting which units were my light infantry units, or words to that effect, as I was using my medium infantry units to represent the light infantry and so they weren't always easy to distinguish. So the past few days I've been working on 4 stands of light infantry. To make them easier to tell apart from the medium infantry units I am only basing them with 6 figures per base and mainly using round shields to help them stand out a bit more on the table top.
Rebasing/finishing my Spanish medium cavalry
Also, I've rebased my Spanish medium cavalry (again). I wasn't happy with the look of the two ranks deep and wanted a more "dynamic" look. In the end I decided to go with 12cm x 10cm deep bases with 6 cavalry per base. So 2 fewer figures than I had been using by I like the dynamic look that this style basing gives.
I've also just painted up the last 4 cavalry figures and completed the second cavalry unit. So a box of Victrix Spanish Medium cavalry will make 2x units for Hail Caesar.
All these troops will be used in this weeks "must win" games vs the Carthaginians.
Kent and I had a great game last night which really went
down to the wire. It was very evenly balanced and closely fought. I had the
advantage for the first few turns but couldn’t quite capitalise on this (a
couple of failed command rolls paralysing units in the middle turns when I
really needed to take advantage of Kent’s disrupted centre command and had seen
a major opportunity to destroy his centre. I used my new tactics (see below) to
use my light infantry more effectively and this worked well and meant I was
able to dictate the tempo in the early turns but in the end Kent’s large
command on his right flank managed to grind their way through my larger
command, get into flanking positions and finally turn the game and a
Carthaginian victory. We both had our share of luck, I rolled really well for
my hits most of the night and Kent’s dice abandoned him but his rolls came right when he had to take break tests and this helped even
things up a bit.
It was a good, close game. It could have gone either way but
when I failed to destroy Kent’s Libyan heavy infantry on my right flank (curse
passing those break test rolls when you are shaken and have been badly mauled), he
was able to reorganise his command and then slowly ground his way through my
troops and eventually emerged victorious.
Things Kent did well
1) Used his commanders
effectively. Whether to reduce the number of hits on units or by throwing
them into combat for a +1 dice Kent always maximises their use and it kept 2-3
units in the game and prevented at least one division from breaking. This is
one area I still need to work on.
2) Use of
skirmishers. Kent used his skirmishers well, when I did create gaps in his
line it meant that my infantry was unable to charge through to get flanking
advantage as the skirmishers were screening/protecting the flank and forced my
troops to go forward.
Note: Actually, this was a rules mistake on my behalf- checking up today I should
have simply ignored the open order troops and charged into the open flank- but we were playing it that they couldn't be ignored. A mistake I only thought about after the game doh! Still, each week we are making fewer mistakes with the rules.
3) Changed
his deployment: I am really enjoying Kent’s early moves which set up a
battle line but then use the width of the table to prevent a simple line up and
bash. In both of the last two games he has used terrain and changed up his
deployment to try something new and they have both paid off for him and caught
me by surprise a bit- which is a good thing and to me highlight one of the
strengths of the rules.
4) Kept his
main combat units cohesive. He used his general’s to get shaken units back
combat effective and also to prop up faltering units. There were two or three
times I was on the verge of breaking commands but Kent managed to rally the
troops enough for some breathing space.
My cunning plan: A change of Tactics
I had a good long think during the week about how to use my
troops to best advantage and put a “cunning plan” into action. My strategy? Make
maximum use of my javelin armed troops (skirmishers and light infantry) to
pepper and disrupt Kent’s lines before engaging with my warband units.
The plan: Have my
warband units screened by 2-3 units of Lusitanian light infantry and skirmishers.
The light infantry only have 5 dice on clash/sustained but give +3 as support,
by keeping them in open order I was able to minimise losses (harder to hit) but
also screen my warbands.
The second stage of my plan was to keep the light
infantry/skirmisher screens just in front of my heavier infantry so that when
the Carthaginian troops charged my light infantry (deployed in open order) were simply able to evade back though my warband units and
become support units.
This meant that invariably Kent’s charging units fell short
so were left exposed to a counter-charge in my own turn by the warband units. As
my light infantry were now safely behind my battle line they were able to add
their weight as support units.
But even on the rare times that Kent’s troops did charge
home my warband benefited from the +3 support dice from the light infantry
directly behind them.
By using the above tactics my warband were able to get the
charge in first for most of the battle and it was only on the last couple of
turns that Kent was able to get some charges in and turn my line.
A few shots of the game:
Turn 1 the Carthaginians move to their left.
The Celtaberians swing right to counter the Carthagian manouvre.
Turn 2 Cavalry clash.
Kent then throws his light cavalry against my remaining mdium cavalry, who become shaken.
On the left the Celteberians throw the Carthaginians back.
Turn 6, the Carthaginians are starting to win the clash on the far right of the battlefield.
And a video report of the game:
Things to work on: Use of Medium Cavalry
Once again though our medium cavalry failed miserably on the first charge we both lost a medium cavalry unit- mine was only just beaten in combat but rolled badly on their break test (again) and legged it, then Kent’s did the same.
My remaining unit of medium cavalry was eventually shaken and made ineffective (though I did rally them at one point) and this is one troop I need to work on improving my tactical use of. Just because they can charge does not necessarily mean that they should and like the infantry should probably make better use of their short range missile (javelins) ability first to soften up targets and for charges vs shaken units- I must learn patience with them!
Campaign Result:
Kent won the battle so captured Aquitania granting him more treasury.
We rolled for our losses, I rolled badly and lost 4 units (2x warband, 1x med cavalry and 1x light infantry) and Kent lost one unit of medium cavalry.
Next week if Kent wins and captures Gallacia then he will have won the campaign so next week’s battle is a very important one...