
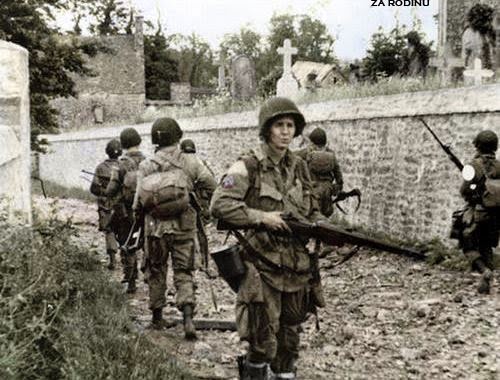
Normandy, June 7th 1944. A reinforced gliderborne platoon was tasked with capturing a strategic bridge, creating a small bridgehead for the ground based troops to exploit.
I'd come up with a cunning plan and painted up a few extras for my paras: an air observer team, 6x SMGs (having seen first hand how nasty Kent's combos of SMG and Assault Rifles armed troops were last week, it was time to fight fire with fire), and a spare loader to convert my LMG to a MMG.
So I decided to run ith a reinforced glider rifle platoon.
I was keen to try out the air rules and the observer as a deterrent to the stug (after my bazooka and 57mm AT gun fell victim to the 222 + stug combo last time) and added as many SMGs as I could squeeze in to each squad and a BAR to each as well. Also, having been on the receiving end of the Kent's larger veteran squads (he runs 10-11 men in each) I decided to do the same. Up to now I've been trying to get 4 squads (of 8 or so men each) working together in pairs, this time I would only have 3 squads and would attempt to keep them close together to support each other. We'd ee how this worked out.
Anyway here is my Glider Rifles list:
1st Lt & NCO (Vets)
11x glider troops (2x SMG, bar, Vets)
10x Glider troops (3x SMG, bar, Vets)
10x Vet infantry (1x SMG, BAR, tough fighters, Vets)
1x sniper (Vet)
1x MMG (Reg)
1x 81mm Mortar (Reg)
1x 57mm AT gun (reg)
1x M16 AA Half track (reg)
1x Forward Air Observer + assistant (reg)
Kent ran his familiar FJ (Vet) force from Wednesday night:
HQ + NCO
2x FJ Squads- both with LMGs (one with 3-4 assault rifles, the other 3-4 SMGs)
1x SS squad (tough fighters- 3-4 assault rifles)
1x MMG (Vet)
1x 81mm mortar (Vet)
1x 222 AC
1x Stug
Everything but the armoured car and stug were vets.
Mission: Point Defence
Having seen off the initial US attempts to capture the important bridge and village the FJ had dug in but deterred by allied Jabbos, and the threat of a preliminary bombardment, Kent decided to hold his armour and armoured car off table in reserve. He stretched out his force to cover three objectives (two of which were hurriedly painted up an hour before the game).
Stephen and I decided to weigh our right flank and ignore the far left objective, we sent our vets to flank the enemy positions while everyone else tried to cross the right hand ford on the river (this time round we made the river impassable except at fords and bridges).
We were attacking from the left side of the board, the ford in in the foreground and the far right objective in the bottom right of picture.

On our far right the FJ dig in near one of the new objective markers- I didn't have time to add static grass.


In a well coordinated advance the two US Glider squads move forward across the ford, my squad leading, Stephen's squad is close behind. Alas Stpehen's troops suffered a FUBAR and opened up on my troops at point blank range- needing 2s to hit!


Kent sends his commander forward to counter attack the Glider troops who ahd reached the far bank, killing a copule more men. The burning mess on the far right of the board is Kent's stug which had just been spotted by a flight of fighter bombers and which lit it up! My infantry then assault the German commanders wiping them out.


The SS had moved from the far left objective to the centre one. On turn 5 the armoured car caught fire thanks to small arms fire fromthe remenants of my squad but the SS hung on. On turn 6 Stephen and I threw all we could at these guys but they survived a hail of fire (including from Grim Reaper) and an assault by the FAO and assistant (which resulted in the our only loss for the game) but the SS just held on.

Result: Draw
It was a complete reversal of Wedneday's battle. Kent had lost 7 out of 8 units and was down to 4 men yet kept the objectives of the game firmly in sight. Stephen and I realised early our mistake of not going for the far left objective but were worried about not concentrating our infantry enough, a smaller flanking force would have been useful but we just didn't have to troops for that. We only lost our observers in a last ditch attempt to kill the last 5 teams and claim the game so even though the reultw as a draw it was a very phyrric victory for the Germans.
The air support was nasty and even with only one strike called in was something that kept Kent worried. Maybe its time to start investing in some flak!
Another great game though, when the dice are rolling hot they roll hot. Stephen and I rolled more than our share of 6s this time round and this no doubt helped our cause but I think the key was concentrating our forces while the mission force the Germans to disperse theirs.

So having driven the Germans from the town, the US para's pause before consolidating their gains.
Craig
No comments:
Post a Comment