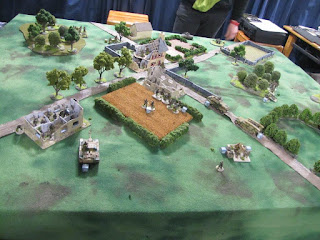
After some more reflection I decided I needed more boots on the
ground so dropped the MMG and the 251/1 for more infantry.
I’ve struggled with 2x squads regular infantry vs Kent’s big
US para mobs (he runs units of about 11 men) so decided to go with 4 squads of vets instead:
·
2x 9 man Vet squads (2x LMGs, 2x SMGs)
·
1x 8 man Vet squad (1x LMG, 3x SMGs)
·
1x Vet Pioneer squad (3x SMGs, flamethrower)-
these guys travel in the 251/7 with the panzerbusche.
The other supports as per my last post (kettenkrad, 37mm AA, Stuh, 233 armoured car, 251/7)
How would they fare? Only time would tell…
Kent ran his typical para list:
Vet HQ, 3x large vet squads (2x tough fighting vets), 57mm AT gun (reg), Sherman, Greyhound armoured car, bazooka, 81mm mortar, sniper and medic.
We rolled up Hold Until relieved and Kent defended. He placed a large (tough fighting) infantry squad and the mortar on table, the rest as his first wave.
The objective.- a ruined building at the crossroads.
120mm mortar is in position.
My infantry started surrounding the objective.
Turn 1, the 233 armoured car and 251/7 with pioneers on board advance.
A squad of paras arrives on Kent's left flank (these are tough fighters).
The sniper scans for targets.
The 57mm AT gun arrives on table.
A zoom shot from the same position.
The stug also arrives.
I tried unsuccessfully to hit the paras with everyrhing I could but failed to do any damage.
Towards the end of turn 1 the Sherman arrives and misses the stug with its first shot. The only casualty of note in turn 1 was my 120mm mortar spotter sniped with an armour piercing shot from the greyhound armoured car.
Turn 2: Infantry move into the forest to screen the Sherman's flank.
The 37mm AA sets up and aims at the US ant tank gun.
Meanwhile my infantry approach the crossroads.
An aerial view from the US lines- everything under control.
Turn 2- my cunning plan. My pioneers debuss and race down the road to the objective- the flamethrower misses (rolled a 1) then ran out of fuel!
Start of turn 3, unperturbed the pioneers charge. Only to realise the paras are tough fighters and lose the assault 6-3! First blood to the Americans.
Then in the woods the other tough fighters charge- having put 3 pins on my panzer grenadiers the paras easily rout them.
On the other flank my infantry move out of the ruined building towards the objective- only to be caught by devastating enfilade from the paras in the nearby woods. Soon the pins rack up and this squad is all but neutralized.
The paras clearing my infantry in the scrub.
The greyhound manages to kill the 37mm with 2 well aimed shots- but by then the US AT gun has also been knocked out.
Start of turn 5: The 251/7 has advanced at the end of the previous turn and advances towards the Sherman, Kent's bazooka is in the foreground fires at the halftrack but misses.
The 233 fires on the infantry on our far right flank as they try to outflank us
A squad advances in open order towards the crossroads.
Unfortunately for the second game in a row the 233 is hit by an 81mm mortar shell and knocked out!
Not to be outdone the panzerbusche knocks out the Sherman for the second game in a row.
Turn 6. Both my remaining infantry suads have 5 or 6 pins on them, the paras still hold the objective but in turn 5 my mortar finally landed a hit and killed 4 teams, leaving 2 men to occupy the objective.
Last turn, the paras in the woods knock out the immobilised half track.
At the end of turn 6 my commander and NCO charge out to contest the objective The paras in the building have finally succumbed to the 120mm mortar but Kent managed to reoccupy the objective with his platoon commander. I could have simply stood outside the objective and contested for a draw but where was the fun in that? My commander charged, lost the NCO but killed the American commander and claimed a.... draw
The objective was still contested by Kent's other squad and the mortar team but it was a much closer game, we both lost 5 units and were contesting the objective, so the closest to win for my Germans yet.
Overall I enjoyed the balance of this force. Having all my infantry as Vets really helped them to survive vs Kent's massed firepower. Once again Kent gave me a lesson in how to maximise firepower to neutralise a unit, doing so two turns in a row to all but eliminate my last two infantry squads. I was a bit unlucky that my flamethrower failed so miserably after I had hatched such a cunning plan to get it into position but that is life. It was a good game and both of us had good opportunities to win it.
We are hoping for another game next week.
Craig


Good AAR and a nice looking game.
ReplyDeleteThanks for sharing.
Matt
Great AAR! I hope you win next time ;)
ReplyDeleteCheers Matt. It was good to roll a few dice again at last.
ReplyDeleteWe are getting there HW :)